
Using Auto Margins in Flexbox
The algorithm for calculating the size of flex items and their distribution within a flex container includes three sequential stages. This process is significantly more complex than in the traditional block model.
Step Three - Applying Auto Margins
If there is free space in a flex container, it is automatically distributed using the margin property set to auto for flex items.
In Flexbox, automatic margins (margin: auto) are much more powerful than in the standard block model. First, they apply in all directions, unlike in block layout where they only work horizontally. Second, auto margins can interact with each other: if multiple auto margins exist on one axis (on different elements or different sides of an element), the free space is evenly distributed among them.
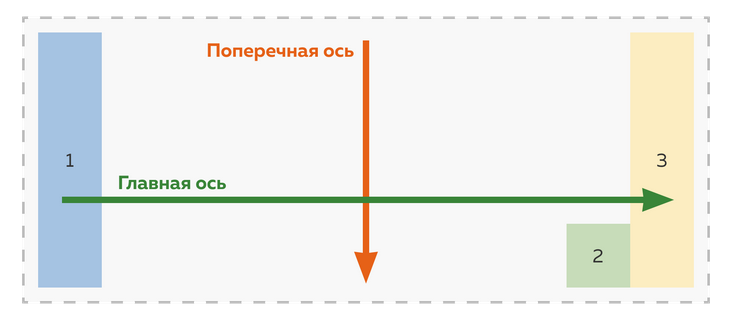
Let’s look at an example. Here, the effect of using auto margins appears with margin-top: auto and margin-left: auto. These properties push the element, forcing it to occupy the remaining free space vertically and horizontally.
.flex-container {
  display: flex;
  flex-direction: row;
}

.flex-container div:nth-child(2) {
  margin-top: auto;
  margin-left: auto;
  width: 200px;
}
Browsers always convert the value of auto margins into specific pixel values. In our example, the browser has already “determined” the amount of free space in pixels along both axes. On the main axis, it subtracted the width of the elements from the width of the container, and on the cross axis — the height of the flex item (including text line height and vertical margins) from the height of the container. Calculations on the cross axis are simpler since each element has its own cross axis.
On the main axis, there is only one auto margin (on the left of the second element), so its size became equal to all the available free space. As a result, this space was fully transferred to the margin, and no free space remained on the main axis. The second element was pushed away from the first, and the third was pressed against the right edge of the flex container.
On the cross axis of the second element, there is also only one auto margin (on the top), so its size became equal to all the available free space. As a result, this space was fully transferred to the margin, and no free space remained on the cross axis of the second element. The element aligned to the end of its cross axis.
The first and third elements stretch to the full height of the container due to the align-items property, which by default is set to stretch. This value stretches flex items along the cross axis if they don’t have a fixed size on that axis and there is available space.
The second element stopped stretching to full height even though it does not have a fixed height. This means that no space remained on its cross axis — it was completely transferred to the auto margin at the top. The key takeaway from this example is that alignment and distribution properties are applied after auto margins. If margins were applied after alignment, the second element would not have shrunk in height.